Posts Tagged ‘Vegetarian’

My trusty chickpea and spinach curry with Tahini yoghurt

October 25, 2010

Chickpea and spinach curry

I must have cooked this curry a thousand times. It’s fab – I suppose it is more like a stew than a curry as it is not very curry-y. It’s one of those “I don’t really have much time but I want something healthy and hearty for dinner” meals. This has been cooked for many of my friends as a last-minute meal and they loved it.

Ingredients (serves 4)

Chickpea curry

2 tins of chickpeas
2 table spoons of cumin powder
2 red onions
6 – 8 cloves of garlic
1 kg ripe tomatoes (ideally roma/egg tomatoes not not essential)
200 grams baby spinach
Salt and pepper

Tahini and Yoghurt sauce

2 tbsp Hulled tahini
1 cup Greek yogurt

Method

Onion and garlic

Finely dice onions and finely chop garlic. Add to heavy based pan with a hearty glug of olive oil and a large pinch of sea salt.

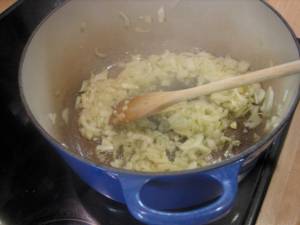
Saute onions and garlic

Saute onions and garlic on a low/medium heat until soft and sweet. Add cumin and cook spice until fragrant making sure that the spice does not burn – this should only take a couple of minutes.

Add diced fresh tomatoes

Dice the tomatoes and add to the pot.

Simmer on a medium heat for 20 – 25 mins until tomatoes have fully broken down and has become “saucy” if you know what I mean. You may need to add a little bit of water if you feel that it is getting too thick.

Add chickpeas

Add drained and rinsed chickpeas and simmer for a further 10 – 15 mins until chickpeas are nice and soft. The tinned ones tend to be a little bit firm.

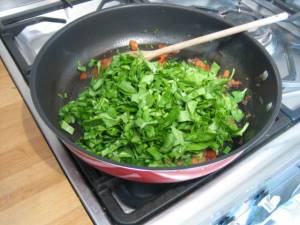
Add baby spinach

Add the baby spinach and stir through – season with salt and pepper to taste. N.B. You will need quite a bit of salt.

Spinach and chickpea curry

Mix the yogurt with the tahini, you can add a little lemon juice and some seasoning if you wish but you don’t really need to.

Serve chickpea curry with brown rice and tahini and yogurt sauce – I sometimes sprinkle the top with oven roasted unsalted cashews and a drizzle of peppery olive oil.

**** Please note the photo of the curry has plain yoghurt on it not the yoghurt and tahini sauce – I ran out of tahini. It’s really worth making though and just to let you know tahini is packed full of calcium and is really really good for you.

Grilled Halloumi and roast baby beetroot salad

August 19, 2010

This is the first time I have ever properly grown my own veg. It was a wee bit of a trial actually to see what would grow (if anything) and if I could do it. Much to my surprise I have managed to grow things. It’s funny I never really expected anything to grow. Over the past few months I have been regularly harvesting my own rocket, baby cos lettuce, parsley, radishes and tons and tons of beautiful flat leaf parsley. Oh the joy of being able to step out side to “gather” the ingredients for a meal – sigh!

It is so exciting watching my beetroots grow steadily larger and on the flip side rather disappointing seeing my fennel struggling along – pesky rabbits are munching on it!

The beetroot is plentiful and I decided yesterday it was time for my first harvesting. Roasted baby beetroot – yummy yummy yummy. With a little bit of a whip round the kitchen and the parsley patch I had all the ingredients I needed for a lovely hearty salad.

Ingredients

8 baby beetroot
4 medium tomatoes (the sweeter and tastier the better)
large bunch of flat leaf parsley
1 lemon
1 block of Halloumi
Olive oil
Salt and Pepper

Method

First things first, cut the stems from the beetroot leaving approx 1 cm. Scrub all the dirt from them and leave some of the tail (root).

Preheat oven to 200 degrees Celsius.

Place in a ceramic oven proof dish whole, if some of the beetroots are a bit large you can cut them in half.

Drizzle with olive oil and season with salt and pepper.

Add about 3 tablespoons of water and cover with aluminum foil.

Bake in oven for 35 – 45 mins or until tender (check with a sharp knife – knife should slide in with only a little bit of resistance).

You may need to add a little more water half way through the cooking as you do not want the juices to burn. A little bit of caramelisation is fine but not charred.

Remove from oven and leave to cool.

Wash and dry parsley, picking the leaves and leaving any tough stems.

Add to a large salad bowl or platter.

Roughly cut tomatoes into chunks and sprinkle over the parsley.

Heat a non stick frying pan and dry fry slices of the Halloumi until golden brown on both sides.

Scatter beetroot and Halloumi over the top of the tomato and parsley and dress with best quality extra virgin olive oil, lemon juice and salt and pepper.

Serve immediately. Good on it’s own with pita bread or as a side with chicken, lamb, kebabs etc.

Lebanese green beans in tomato sauce

August 19, 2010

Green beans are generally difficult to get excited about mainly because of the “squeak” factor. When green beans are not quite cooked enough they squeak when you bite into them. It really sends a shiver up my spine and gives me goose pimples. However, (you knew there was going to be a however didn’t you!!) this dish is so delicious and doesn’t have a squeaky bean in sight.

I have eaten this bean dish on many occasions since I was a little kid and always wondered how they can taste so good. The Greeks, Turkish and Lebanese all make a similar dish, I generally call it “collapsed beans” as they are cooked until they collapse. Several years ago I was discussing this dish with my Lebanese fruit and veg grocer who ran off to get his wife so that she could give me the recipe. What a legend. I have been making it ever since. They also gave me a pot of “Lebanese Pepper” which until recently I had no idea what was in it. I now have the recipe for that too…phew!

The beans are a great side to meat, grilled fish, chicken or just served as the main part of a meal with some spicy rice with toasted almonds, pine nuts and cashews.

Ingredients

500 grams of round green beans (french beans)
4 medium brown onions (I had a mixture of red and brown – doesn’t really matter)
1 1/2 tins of best quality tinned tomatoes
Salt
Pepper
Olive oil
Lebanese Pepper (blend of ground Allspice, Black pepper, Cinnamon, Cloves, Nutmeg, Fenugreek, Ginger)

Peel and slice onions by cutting in half and slicing thin half moons. Add to a large heavy based pan with a good glug of oil.

Fry onions on a medium heat until soft, sweet and translucent. Do not brown.

Add washed beans with tops/stalks removed (leave tails). Add to pot. Boil kettle.

Once beans have turned a brilliant green colour add enough boiling water to cover the beans.

Cook on medium heat until water has reduced by half. Add tinned tomatoes.

Continue to cook until tomatoes have broken down and beans are cooked through and collapsed.

Add teaspoon of Lebanese peppers and season to taste.

This dish reheats well and tastes even better the next day.

Corn and ricotta fritters – easy, cheap and super versatile

August 18, 2010

Corn and ricotta fritters

I recently catered for a party, the brief was no warm food – in Scotland!!!! Certainly a challenge. One of the things I decided to try was corn fritters. My mum used to make them for us when we were kids and I loved them. However they were warm….so I did I test run and I am pleased to say that they are just as lovely cold as they are warm.

So I made about 70 of them, little weenie bite sized ones and topped them with a herby cream cheese and a baby roasted Roma tomato.

Success, every single one of them was gobbled up.

Now you don’t have to have them cold obviously, they are great eaten straight from the frying pan or toasted the next day or dare I say microwaved for little bit to warm them. Actually toast them – I hate microwaves!!!

Corn fritters are easy quick and tasty and can be eaten as a snack, for breakfast with some crispy bacon or as a light lunch or dinner with a salad and a tasty tomato and mint salsa….yummy:

Ingredients (makes about 20 mini ones or 8 – 10 larger ones)

7 tablespoons of plain flour
1/2 teaspoon of bicarbonate of soda
1 teaspoon of cream of tartar
Salt and Pepper
200 grams of fresh full fat ricotta
50 grams of finely grated Parmesan (fresh not dried of course)
1 large onion
1 large egg
2 cobs of fresh sweetcorn
Milk (approx 500 mls)
50 grams of unsalted butter

Method

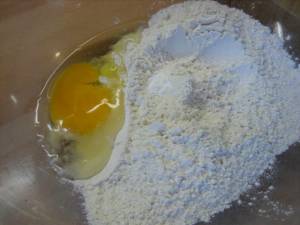
Flour egg cream of tartar bicarb

Sift flour, cream of tartar and bicarb into a large mixing bowl. Add the egg and some milk and beat until combined. Add more milk, a large pinch of salt and several grinds of the pepper mill. The batter should be relatively thick – about the same consistency of drop scones (Scottish pancakes) or picklets.

Place in the fridge covered in cling wrap.

onions and butter

Finely dice onion and saute on a low to medium heat with the butter and a pinch of salt until soft sweet and translucent. Leave to the side.

Removing corn kernals from cobs

Remove husk from corn and wash the cobs. Cut the kernels from the cobs.

Batter corn onions ricotta and parmesan

Add sautéed onion, corn, ricotta and finely grated parmesan to the pancake batter and stir through to combine.

Batter mixed through

You may need to add a little bit more milk to loosen the batter if it feels a bit too stiff.

Fritters in pan

Heat a non stick frying and grease with a little butter.

Dollop spoonfuls of the pancake batter into the pan giving each spoonful a little room as they will spread a bit.

Keep the temp at a medium heat as you do not want them to be burnt on the outside and uncooked in the middle.

Turn fritters when golden

Turn when golden brown and bubbles have formed and burst on the top side of the pancake/fritter.

Cook until both sides are golden and the pancake is cooked through. If the outside is cooked and the inside is not you will need to reduce the temperature.

Cool in a clean tea towel – it will absorb any moisture and keep them nice and crisp on the outside.

Eat straight away or cool completely in tea towel then seal in a Tupperware box and refrigerate until you want to eat them. They should keep for a couple of days and I don’t see why you wouldn’t be able to freeze them actually….

Warm quinoa salad – super healthy

July 26, 2010

Warm quinoa salad

Sometimes you need to put the butter, cream and cheese away and eat some “clean” food. Quinoa is a bit of a wonder grain it is gluten free, high in protein, omega 3 and 6 and most importantly delicious. This salad is vegan and is a complete meal containing protein, carbohydrates, a little good fat and lots of vegetables. If you are being virtuous and trying to eat healthily on a regular basis you need some substance to your food. Lettuce will not fill you up on it’s own!

Ingredients (serves 4 – 6)

250 grams golden quinoa
1 tin of chickpeas
2 red onions
2 carrots
1 bunch of asparagus
1 red pepper
1 veg stock cube
handful of almonds
handful of pepitas (pumpkin seeds)
handful of sunflower seeds
small bunch of flat leaf parsley
approx 12 mint leaves
1 lemon
Peppery extra virgin olive oil
Red wine vinegar

Method

First things first you need to get the quinoa cooked. Thoroughly rinse the quinoa in a sieve, until the water runs clear.

Pop in a pan on the stove with approx 2 cups of boiling water and the stock cube.

Cooking quinoa

Bring to the boil and then simmer until most of the liquid has evaporated (approx 10 – 15 mins). Put the lid on and then turn temp to the lowest setting and keep cooking until all liquid has gone. Taste the quinoa, it should be soft. If not add a splash more water and keep cooking until it is soft. If you look closely little spirals will be released from the grain – this is another way to know it is cook. Always best to taste though.

When cooked fluff with a fork and put in a large heat proof bowl to cool.

Quinoa cooked and set aside to cool

Cut onions in half and slice finely. Fry in a little olive oil until browned. Leave to the side to cool.

Fried onions

Onions set aside to cool

Char grill whole red pepper on a BBQ or on a grill pan. When blackened all over remove and place in a clip lock sandwich bag to “steam” and cool so that you can handle without scalding yourself.

Peppers and carrots char grilling

Once cooled peel off the blackened skin and remove seeds then slice finely into strips.

Peel the carrots and slice on the diagonal into rings approx 3-4 mm thick. Grill on char grill until cooked through and striped by the grill. Remove and cool.

Snap the woody ends from the asparagus spears by holding the stem near the end and bending until it snaps. The asparagus will automatically snap at the point where the woody bit ends. Wash and pop on the grill too until cooked but still a little crisp (it will keep cooking when removed from the grill).

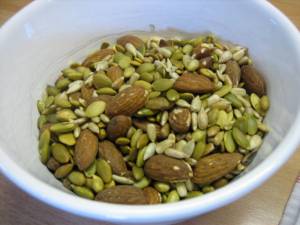
Pre heat your oven to 200 degrees Celsius and put the almonds, pepitas and sunflower seeds on separate trays in the oven (almonds at the top as they will need longer). Bake for 5 mins check to see if they are toasted enough if not keep checking every couple of minutes to make sure they don’t burn. I usually set the timer – if I don’t I end up with charred nuts which go straight in the bin.

Once the nuts and seeds are toasted remove from the oven and cool.

Toasted nuts and seeds

Cut the asparagus into 2 cm lengths also cut on the diagonal and roughly cut the carrot slices.

Add fried onions, roasted pepper, rinsed chickpeas, carrot and asparagus to the quinoa with roughly chopped parsley and mint and the juice of a lemon. Season with salt and pepper and drizzle with peppery extra virgin olive oil and a little red wine vinegar.

Quinoa salad

Toss salad through and serve with a sprinkle of toasted nuts.

Eat as much as you like because it is super healthy…..

To make it a little more exciting feel free to add some grilled haloumi, roasted butternut pumpkin or roasted sweet tomatoes. It would also be really nice with some spice added, a little cumin and maybe even some chili would be great. If you do use spices fry them in with the onions to release the flavours.

***BTW I didn’t have chickpeas and only had a bizarre tin of “bean salad” which had corn, beans and french beans in it….don’t recommend you try this at home. Tee Hee.

American bean chili – Soho style

June 23, 2010

American bean chilli

The last time I was in New York it was February and absolutely freezing!!! With Australia weight clothing I was so cold the whole time. One Baltic afternoon Adam and I found ourselves in the back streets of Soho and stumbled across a small cafe which was absolutely packed. Always a good sign we went inside and got a great “feed”. It was anything but posh and very cheap but fantastic.

We both had a bowl of chili which gave us a warm glow and smile on our faces before we headed back out into the snow.

Ingredients: (serves 4 – 6)

2 red onions
6 cloves of garlic
2 carrots
2 sticks of celery
2 medium size courgettes
1 red pepper (capsicum)
2 tins of peeled tomatoes
2 tins of red kidney beans
Ground cummin
Sweet paprika
Dried oregano
Olive oil
Salt and Pepper
Tomato puree
Kecap Manis (optional)

Dice onions and finely chop garlic, pop in a heavy based pot and saute until soft and sweet in olive oil with a large pinch of salt.

Topping

1 red onion diced
Grated mature cheddar cheese

Onion and garlic sauteed

Finely dice celery and carrots and add to the pot.

Add finely diced carrots and celery

Saute carrots and celery for about 5 mins then add in diced red pepper. Add 3 tablespoons of cummin, 1 tablespoon of oregano and 1 tablespoon of paprika.

Add finely diced red pepper

Add tinned tomatoes and approx 2 tablespoons of tomato puree.

Add tinned tomatoes and tomato puree

Bring to the boil and then reduce heat to low/medium and simmer. Cook until carrots and celery are soft and the tomatoes have broken down into a thick tasty sauce. At this stage add in the kidney beans making sure you have rinsed them well and diced courgettes (in 1 cm cubes).

Add courgettes

Add in about 1 tablespoon of Kecap Manis (optional).

Add Kecap Manis

Cook for a further 10 – 15 mins or until courgettes are tender.

Season to taste and serve with brown rice, topped with diced raw red onion and grated cheese (sounds weird but trust me it tastes GREAT).

You can also add in aubergine which gives the chili a really lovely texture/flavour. Dice the aubergine and add to the pot along with the carrots and celery.

Quick and easy spinach, tomato and Parmesan omelette

May 27, 2010

Spinach tomato and Parmesan omelette

Omelette is one of those things that vegetarians get for dinner when people don’t know what to cook for a vegetarian. Flooded in cheese and resembling a big greasy rubbery frisbee – delicious (note heavy sarcasm).

It just doesn’t have to be that way.

A good omelette is fabulous. It’s quick and tasty.

I don’t make them very often and when I do it is usually for breakfast – it kind of feels like a bit of a cop-out to make it for dinner.

The success of a good omelette, I believe, lies in the pan. It has to be a good non stick frying pan or omelette pan.

Another essential is not to over cook the omelette. It will keep cooking when it is on the plate so make sure that you remove it from the heat before it is “ready”.

Anyway I cooked a cracking omelette the other day and thought I would share it with you, I had it for breakfast but I won’t judge you if you want to cook it for dinner – honestly.

Ingredients

3 free range eggs
Approx 100 grams of baby spinach
1/2 medium red onion
1 ripe tomato
Parmesan (Reggiano or Padano)
Olive oil and/or butter
Salt and pepper

Finely dice onion and saute in frying pan with a little olive oil, a little knob of butter and a pinch of salt.

Sauted onion

When cooked through and soft add tomato diced.

Add tomato

Crack eggs into a bowl and lightly whisk with a fork. Add a pinch of salt and some freshly ground black pepper.

Add roughly chopped spinach

Roughly chop spinach and add to the frying pan with the onion and tomato, cook until wilted then remove from the pan.

Wipe out frying pan and add a little more butter and olive oil.

Pour eggs into pan and stir a little

Pour egg into pan and stir a little bit.

Sprinkle Parmesan on omelette

Sprinkle about a tablespoon of finely grated Parmesan onto the omelette and place the spinach down the middle and then fold over.

Add spinach

Pop onto a plate and eat immediately.

Gemista – Greek slow cooked stuffed vegetables

May 27, 2010

Gemista

I am on a roll with Greek food. No matter where I go I seek out Greek restaurants hoping that they will have an old Greek granny in the kitchen making traditional Greek food.

Unfortunately more often than not I am disappointed. One of the best Greek restaurants I have ever been to was actually not in Greece. It was in Balmain in Sydney and was called Artemis’s Village.

For many years it was my favourite restaurant. I felt like I was having dinner at my Greek friends house eating proper “home cooking”.

Great Spanakopita (spinach and cheese pie) and Tiropita (cheese pie), amazing Saganaki prawns (large fresh prawns in a garlicky tomato sauce with chunks of feta dotted through) and Gemista (stuffed veg).

Unfortunately Artemis (the Greek mama in the kitchen) retired and the family sold the restaurant. It was taken over but was never the same….sob sob.

I judge all Greek restaurants on the quality of their Gemista.

Firstly I will not even bother going into the restaurant unless they have Gemista and secondly it must be vegetarian – why do some restaurants put mince in their stuffed veg – yuck!

I have successfully made stuffed tomatoes many times before but have been unsuccessful with my stuffed peppers. So I had a little google search the other day and scanned a few recipes. One thing I picked up from my searches was once the peppers were stuffed and put in the oven a glass of water was added to the roasting dish. This makes the peppers nice and soft and also prevents them burning.

With this new piece of culinary genius I had to tackle stuffed peppers one more time.

Ingredients

8 large ripe tomatoes (6 for stuffing and 2 for the sauce)
2 large courgettes
6 small to medium peppers (I used red and yellow ones)
2 medium brown onions
4 large cloves of garlic
1 large glass of dry white wine
Small bunch of flat leaf parsley
Handful of fresh mint leaves
Approx 1 dessert spoon of fresh thyme leaves
250 grams of Arborio rice
Salt and Pepper
Olive oil

Pre heat oven to 190 degrees celsius.
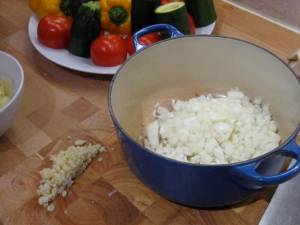
Onion and garlic into the pot

Finely dice onions and garlic and saute in a heavy based pan with about 4 tablespoons of olive oil and a pinch of salt.
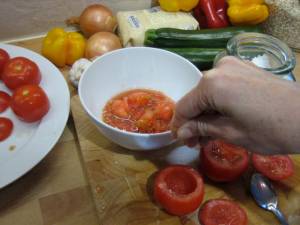
Scooping out the inside of tomatoes

Cut the “bums” off 6 of the tomatoes to make a lid, scrape out the insides of the tomatoes and add to a bowl.

Sprinkle with salt and leave upside down on a plate.
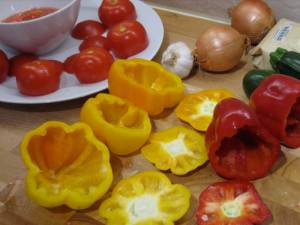
Peppers deseeded and caps cut off

Cut the tops off the peppers and discard the seeds. Sprinkle with salt and place upside down on the plate alongside the tomatoes.

Removing the centres of the courgettes

Cut the courgettes into 3 leaving the stem on, carve out the middle of the courgette, chop and keep to the side. Sprinkle inside with salt and add to plate.

Once onions and garlic are cooked, soft and sweet with no colour add the rice and stir through until coated with oil.

Add wine to rice, onions and garlic

Add wine and reduce.

Chopped tomatoes added to the rice mix

Chop up the insides of the tomatoes and the 2 left over tomatoes and add to the pot with the chopped up courgette insides too.

Turn the heat down and simmer until the rice has cooked for about 10 mins. Try not to add water there should be enough liquid. However if it is really drying out you can add a splash of water (make sure the heat is not on too high).

The rice should be cooked but still have quite a bite too it (more of a bite than you would have with a risotto).

Add chopped herbs

Finely chop the parsley and mint and add to the rice along with the thyme leaves.

Taste rice for seasoning add salt and pepper if you need.

Stuffing peppers with rice

Stuffing courgettes with rice mix

Fill the tomatoes, peppers and courgettes with the rice mix and put the lids on the peppers and tomatoes – make sure you do not over fill the veg as the rice will continue to expand as it cooks in the oven and it may split the skins.

Stuffed veg ready for the oven

Pack stuffed vegetables into a ceramic dish with at least 5 cm sides.

Add a glass of water and a drizzle a good quantity of olive oil over the veg.

Pop it in the oven for 1 – 1 1/2 hours or until the peppers are soft/collapsed.

Stuffed peppers, tomatoes and courgettes

I covered mine with foil for the 1st half of the time so that it steamed too but you do not have to do this.

Gemista

Serve with a green salad and a glass of chilled red wine.

Close your eyes and think of Greece……

Kefalonian spinach and feta pie (with roast pumpkin thrown in)

May 24, 2010

Spinach Pumpkin and feta pie

How can you go wrong with puff pastry? It’s just great, obviously not the best diet food but everything in moderation.

I am a huge fan of Greek food – good Greek food that is. Stuffed veggies, slow roast lemon potatoes, Tzatziki, Greek salad and my absolute favorite Spanakopita.

While I was at Art College I managed to wangle a job in a bar on the Greek island of Kefalonia for the summers. I had an absolute ball, at the time I was in my late teens early twenties and I really can’t think of anything I would have enjoyed more!

After work my friends and I would head off to get something to eat. It was usually about 5am and the place was always buzzing, our options were to head down to the square for Souvlaki, the beach for a toasted sandwich or to the bakery for fresh out of the oven Spanakopita.

My first choice every time was the bakery. Gorgeous flakey puff pastry filled with spinach and feta. Yummy!

So I decided to make my own version tonight but with a little difference I added some roast butternut pumpkin because I had some in the fridge, and pumpkin, spinach and feta goes really well together.

Ingredients

1 block of puff pasty or sheets
200 grams of English spinach
1 red onion
1 large lemon
1 teaspoon of fresh thyme leaves
1 teaspoon of fresh mint finely chopped
1/2 cup of finely grated Parmesan (Padano or Reggiano)
150 grams of feta crumbled
1 1/2 cups of 1 cm diced butternut pumpkin
Olive oil
Salt and Pepper
1 egg
Sesame seeds (optional)

Preheat oven to 200 degrees Celsius.

Finely diced onion

Finely dice onion and add to large bowl.

Finely sliced spinach

Wash dry and finely slice spinach and add to the onions.

Onion spinach and lemon with pinch of salt

Add a pinch of salt to the bowl and the juice of one lemon give a good mix through.

Diced pumpkin

Pop pumpkin pieces into a roasting dish and add a pinch of salt and a few turns of the pepper grinder. Add a glug of olive oil and toss so that the pumpkin in coated.

Put pumpkin into the oven for approx 20 – 30 mins until the pumpkin is cooked and slightly golden in colour. Make sure you regularly stir the pumpkin to ensure that it does not stick and roasts evenly.

Squeezing out the liquid from the spinach

After the spinach has been sitting for about 20 – 30 mins it should have released a lot of liquid. Empty the spinach mixture into a colander or sieve and squeeze out as much of the liquid as you can.

Spinach feta parmesan thyme mint

Pop the spinach into a clean dry bowl and add the thyme leaves, finely chopped mint, crumbled feta and grated Parmesan. Season with pepper and a little salt (if you need it). Stir through thoroughly.

Spinach mixture

Once the pumpkin is cooked add to the spinach and cheese mix.

Add pumpkin to the spinach mix

Increase the oven temperature to 220 degrees.

Rolled out puff pastry cut into 15 cm squares

Roll out the puff pastry on a floured surface and cut into 15 cm squares.

Spinach mixture onto pastry

Add a large spoonful of the spinach mixture to the center of the pastry squares.

Press edges together with fork

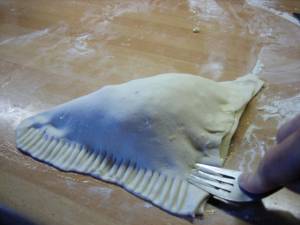
Brush the edges of the pastry with lightly beaten egg and fold over to make triangles. Press the edges together and either mark with a fork or fold over on its self to create a sealed edge.

Pies on a baking sheet ready to go in oven

Brush the pies with egg wash and sprinkle with sesame seeds.

Place on a floured baking sheet and bake in oven for 15 – 20 minutes until golden brown – make sure you check the underside of the pies – this should also be golden brown. If not put back into the oven and back for a few more minutes until the underside is golden brown.

Pies cooked

Serve with a leafy salad.

Spinach feta and pumpkin pie with salad

You could make smaller versions of these for finger food or picnics.

Delish! And also good cold.

Easy tasty Stuffed Aubergines

May 10, 2010

Stuffed Aubergines

The majority of my friends have eaten this meal at my place – it is my “what will I cook?” first choice.

So easy, rather impressive and super tasty.

2 medium aubergines
1 medium red onion
4-6 cloves garlic
6 medium size ripe tomatoes
1 block of feta or ball of fresh mozzarella
Herbs (Parsley and/or Basil)
Parmesan

Salt and Pepper
Olive oil

Pre heat oven to 200 degrees celsius.

Cut Aubergines in half, length ways, leaving stalk on. Score the flesh in a criss cross pattern, try to cut as far down as you can without cutting through the skin.

Aubergines scored with olive oil and ready for baking

Drizzle with olive oil and place on a baking tray in the oven until the flesh is golden and cooked through. This should take 25 – 35 mins.

Whilst the Aubergines are cooking dice the onion and finely chop the garlic and add to a heavy based pot with a hearty glug of olive oil and a pinch of salt.

Onion and garlic finely chopped and sauteed

Saute until soft and sweet – do not brown.

Add finely chopped fresh tomatoes ( you do not need to remove the seeds and skins).

Chopped fresh tomatoes added to onions and garlic

Cook on a medium to low heat until tomatoes have broken down into a thick sauce.

Saucy tomatoes

Once Aubergines are cooked through remove from oven and let cool for a little bit, so that you can handle them without burning yourself. Scoop out flesh being careful not to tear skins, you can leave a little bit of flesh in the skins. Add scooped out flesh to the tomatoes. Add a large handful of finely sliced flat leave parsley and/or basil and crumble feta through in large-ish pieces (or 1 cm pieces of mozzarella).

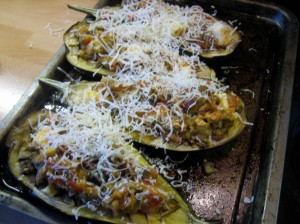
Stir through (off the heat) taste and season if needed with Salt and Pepper – then refill the Aubergine shells. Grate some fresh parmesan over the top and pop back in the oven for 15 – 20 mins until cheese is melted and golden.

Baked aubergines

Aubergines stuffed and ready to go in the oven

Serve with a large fresh salad.

This should serve 4 or 2 very hungry people!!