Archive for the 'Starters' Category

Beetroot and sourcream dip

October 25, 2010

Beetroot

I have been overrun with homegrown beetroot. Not a terrible situation to be in as I LOVE beetroot!

The other night I decided to knock together a beetroot dip. Something that I have eaten many times before but never made. Incredibly simple, tasty and perfect as part of a mezze.

Not only is this dip tasty it is also good for you – don’t you just love that. Beetroot is packed full of folic acid, phosphorus, magnesium, iron and vitamin B6 along with huge amounts of antioxidants.

Winner!

Ingredients

4 large beetroot or 7 – 8 small ones
Olive oil
Salt and Pepper
150 ml Sour Cream
Juice of 1/2 lemon
Nutmeg (optional)

Method

Scrub the beetroot well and remove the root and any stalks. Cut larger beetroot into quarters and smaller ones in halves. Place in an oven proof dish, drizzle with olive oil and season with salt and pepper.

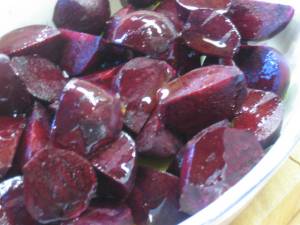
Beetroot ready for roasting

Add a splash of water and cover with foil. Bake in oven at 200 degrees Celsius for approx 25 – 35 mins or until tender.

Remove from oven and leave to cool.

Beetroot and sour cream in fod processor

Once cool put in food processor with sour cream and blend – add lemon, salt and pepper and grated fresh nutmeg to taste.

Beetroot dip

Serve with hot flat bread, pita chips or plain crackers.

Homemade Roast Butternut pumpkin and ricotta ravioli with parmesan cream sauce…..dribble

September 4, 2010

Rolling pasta

I am hoping that the pasta maker will not turn out like the bread maker – 1 month of fun then several years of being tucked away in the back of the cupboard. One week in and I feel like that won’t be happening. Back in Sunny Sydney I made my first homemade pasta with my friend Kate who had been to an Italian cooking course, she arrived at my house Tipo ’00 and pasta maker in hand. We made cracking spinach and ricotta cannelloni. It was sensational and relatively easy. Since then I have had a few pasta making flutters including gnocchi – which, may I add, is VERY easy to make and you do not need any special equipment. (see my recipe for Gnocchi with Gorgonzola and walnuts). Other than that the trusty De Cecco Linguine has been my pasta of choice. Until now! My lovely sister decided to by herself (or should I say me) a pasta maker. After a few minor hiccups we managed to produce a rather wonderful roast butternut pumpkin ravioli with a burnt butter and sage sauce. As this was my first venture back into pasta land I didn’t take any photos (doh!!) So decided to do a re run for “the blog” this week. I didn’t have any sage so whipped up a creamy sauce instead which turned out to be rather delicious. By the way you can make pasta with a rolling pin and a bit of elbow grease – worth giving it a bash if you are not sure whether to invest in a pasta maker. However they are not very expensive you can get one for about £20.

Ingredients

Pasta

500 grams plain flour (ideally Tipo 00)
6 medium sized eggs or 5 large eggs

Filling

200 grams ricotta
50 grams finely grated Parmesan
Approx 800 grams Butternut Pumpkin (squash) whole weight before peeling and de-seeding
Whole nutmeg
Salt and Pepper
Olive oil

Sauce

1 clove garlic
1 large knob of butter
Salt and pepper
Splash of dry white wine
100 mls double cream
50 grams finely grated Parmesan

Method
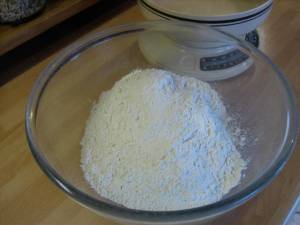
Flour

To make the pasta dough.

Put flour in a large mixing bowl. Crack eggs into a separate bowl or jug and lightly whisk to combine.
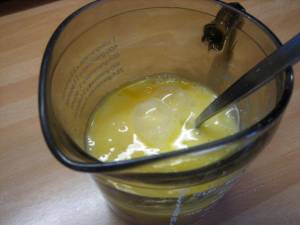
Whisked eggs

Make a well in the middle of the flour and add the egg mix.

Mix eggs in with a fork

Mix together with a fork until egg has been mixed in.

Bring dough together with hands

Bring together with your hands into a dough.

Remove from bowl and knead until smooth. The dough will feel relatively dry – don’t worry it will soften up a little.

Dough

Wrap in cling film and rest in fridge for min 30 mins.
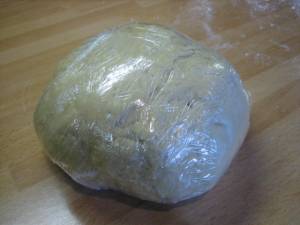
Dough wrapped in cling film

Pre-heat the oven to 200 degrees Celsius.

Pumpkin ready for roasting

Peel butternut pumpkin and remove seeds. Cut into 1cm cubes and add to a baking dish. Toss through a little olive oil until coated and pop into the oven.

Bake until soft and a little golden – make sure you check regularly and give the pumpkin a toss around.

Leave to cool.
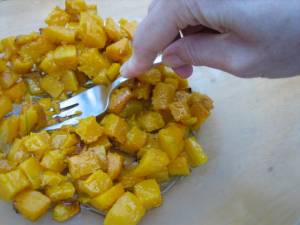
Mashing pumpkin with fork

Mash with a fork until smooth (ish).

Mashed pumpkin

Add ricotta, grated Parmesan and some nutmeg (about 1/6), mix well to combine. Taste the mixture and add salt and pepper to taste. If you want you can add more Parmesan.

Add ricotta Parmesan and nutmeg

Once the pasta has rested split the dough into 4 smaller balls. Keep one of the balls and re-wrap the rest and place back int he fridge.

Set the pasta maker to the widest setting.

Roll pasta

Flatten the dough into an oval shape, dust in flour to prevent it sticking and feed it through the pasta maker.

N.B. My first try came out with holes through it, this was because there were air bubbles trapped in the dough. I mashed the dough back into a ball and then rolled it out again with a rolling pin – this helped remove the bubbles and kick start the rolling process.

Turn the pasta maker down a notch and roll again, you may need to lightly dust the pasta again with some flour.

Keep doing this until the pasta is about 1mm thick.
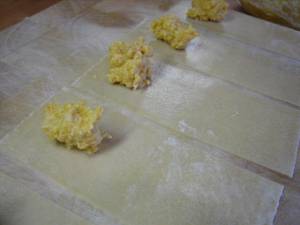
Pasta strips with pumpkin mix

Lie the pasta onto a floured surface and cut into 4 cm strips.

Put a small amount (approx 2/3 teaspoon) at one end of the strip and lightly brush around it with water. Fold the other half of the strip over to create a parcel. Be careful not to trap air inside the ravioli as this will expand when cooked and may burst open.

Making ravioli

Keep doing this and lay them out onto a floured tray, do not pile them on top of each other as they may stick – from experience!!
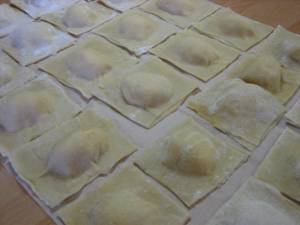
Ravioli

Once you have used your first batch of rolled out pasta you can continue with the rest of the pasta until you have made as many as you wish. This amount of dough and filling should feel 8 people for main course or 14 starters.

You can freeze the pasta, pop them in the freezer on the tray. Once frozen you can bung them in a tub or a bag. You can cook them straight from frozen.

Ok to cook and serve.

Bring a large pot of water to the boil and add a teaspoon of salt.

Warm a non stick frying pan with the knob of butter and a splash of olive oil.

Butter and garlic

Add crushed garlic and saute for a couple of minutes until soft and sweet – no colour. Add glug of white wine (approx 3 table spoons). Simmer to reduce wine to almost totally evaporated. Add the cream. Simmer until thickened a little then remove from heat and add Parmesan. Stir through and season to taste (you probably won’t need salt).
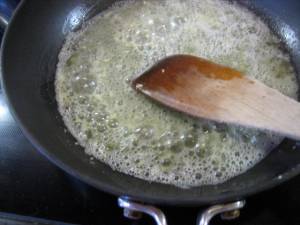
Add wine

Reduce wine

Pop the pasta into the pot, I probably wouldn’t do not than 4 serves in the one pot.

Ravioli in boiling water

Cook for about 4 minutes then remove one and see if it is cooked. You may need to cook the ravioli for a little longer it really depends on how thick the pasta is – everyone’s pasta is slightly different. Once cooked drain in a colander and toss through sauce, serve immediately in warmed bowls.

Ravioli in cream parmesan sauce

Ravioli

The creamy sauce is great but so is the burnt butter and sage. This is made by taking about 75 grams of butter and heating it on the stove until it is bubbling (this is for 4 people). Do not heat at too high a temp as it may actually burn, you are looking for a nut brown colour. Add sage leaves (about 8 small to medium leaves per person or 4 large). The sage leaves should be crisp once cooked. Pour over the top of the ravioli when it is plated up and top with some finely grated Parmesan.

I am planning on trialing some other filling so will keep you posted!

Feta, tomato and herb toasts – a cheeky little snack with a hint of Greece

August 30, 2010

Grilled feta, tomato and herbs

This is a bit of a twist on grilled cheese on toast with a little bit of Greece thrown into the mix.

Ingredients

Good bread or rolls
1 block of feta (approx 200 grams)
1 tasty tomato
1/2 small red onion
Fresh herbs (I used parsley, mint, chives, thyme)
Dried oregano
Extra virgin olive oil
Salt and Pepper

Method

Finely dice onion and tomato and add to a bowl with crumbled feta. Add finely chopped fresh herbs removing any touch stalks. Add 1/2 teaspoon of dried oregano and a healthy glug of olive oil. Mash together and season.

Pile on top of halved rolls of slices of good bread, drizzle with olive oil and grill until golden.

Eat with relish.

Traditional Spanish Tortilla so very delicious

August 30, 2010

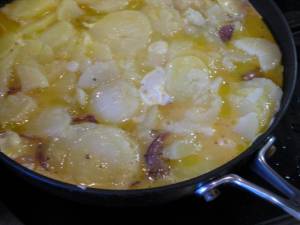
Spanish tortilla

So there is practically nothing in the house to eat. Some eggs, some potatoes and some onions. (home-grown onions and potatoes by the way – quick brag!) So what to make? Kind of a rhetorical question really as in the real world there is only one option. Spanish Tortilla of course! Or chips and fried eggs I suppose (also delicious but slightly less sophisticated.) That actually reminds me of a holiday my sister went on to Andalusia staying at her friend’s parents holiday house. Fiona is a mad foodie like myself. Prior to leaving for the holiday she was given the “top tips” on the local food and best places to eat. There were many lovely places and meals to experience however Fiona’s friend had made her promise that she would try her all time favorite meal at her favorite restaurant. So with a lot of anticipation Fiona went to the recommended restaurant and ordered “las patatas y huevo fritas” and was presented with chips and egg. She said it was delicious however not exactly what she was expecting.

Long story cut short – I am a massive fan of Spanish tortilla (and chips and egg for that matter!)

Ingredients: serves 4

4 large potatoes
3 medium sizes brown onions (I only had red ones)
8 large eggs
Salt and Pepper
Olive oil

Method

Potatoes peeled

Peel and thinly slice the potatoes (approx 2-3 mm slices). Toss the potatoes in a large pinch of salt and steam until tender.

Finely sliced potato seasoned with salt

Peel and finely slice the onions and saute in a non stick frying pan in a good quantity of olive oil and a large pinch of salt.

Finely sliced onions

Saute until they are soft, sweet and have a bit of colour.

Sauting onions

Sauted onions in bowl

Crack eggs into a jug season with salt and pepper and whisk with a fork – try not to get too much air into the mixture, just whisk until combined.

Eggs in jug seasoned and whisked

Heat a non stick omelet pan with approx 2 tablespoons of olive oil.

Spanish tortilla

Add layers of potatoes and fried onions then add the egg mix. Keep approx 1/4 of the egg mix to the side. Cook on a medium heat until the tortilla is cooked through and the base is golden.

Flip the tortilla onto a dinner plate.

Add a little bit of oil to the pan again. Slide the tortilla back into the pan with the cooked side up.

Slide tortilla onto plate prior to flipping

Pour the rest of the egg mix into the pan – down the side so that it fills in any gaps on the base.

Cook until base is golden brown then flip out onto a plate and leave to cool for approx 30 mins.

Slice and serve with some mixed salad leaves. Or cut into small squares and eat as a tapas dish with drinks.

It is really important not to skimp on the salt with this dish – salt is the key to success!!

Grilled Halloumi and roast baby beetroot salad

August 19, 2010

This is the first time I have ever properly grown my own veg. It was a wee bit of a trial actually to see what would grow (if anything) and if I could do it. Much to my surprise I have managed to grow things. It’s funny I never really expected anything to grow. Over the past few months I have been regularly harvesting my own rocket, baby cos lettuce, parsley, radishes and tons and tons of beautiful flat leaf parsley. Oh the joy of being able to step out side to “gather” the ingredients for a meal – sigh!

It is so exciting watching my beetroots grow steadily larger and on the flip side rather disappointing seeing my fennel struggling along – pesky rabbits are munching on it!

The beetroot is plentiful and I decided yesterday it was time for my first harvesting. Roasted baby beetroot – yummy yummy yummy. With a little bit of a whip round the kitchen and the parsley patch I had all the ingredients I needed for a lovely hearty salad.

Ingredients

8 baby beetroot
4 medium tomatoes (the sweeter and tastier the better)
large bunch of flat leaf parsley
1 lemon
1 block of Halloumi
Olive oil
Salt and Pepper

Method

First things first, cut the stems from the beetroot leaving approx 1 cm. Scrub all the dirt from them and leave some of the tail (root).

Preheat oven to 200 degrees Celsius.

Place in a ceramic oven proof dish whole, if some of the beetroots are a bit large you can cut them in half.

Drizzle with olive oil and season with salt and pepper.

Add about 3 tablespoons of water and cover with aluminum foil.

Bake in oven for 35 – 45 mins or until tender (check with a sharp knife – knife should slide in with only a little bit of resistance).

You may need to add a little more water half way through the cooking as you do not want the juices to burn. A little bit of caramelisation is fine but not charred.

Remove from oven and leave to cool.

Wash and dry parsley, picking the leaves and leaving any tough stems.

Add to a large salad bowl or platter.

Roughly cut tomatoes into chunks and sprinkle over the parsley.

Heat a non stick frying pan and dry fry slices of the Halloumi until golden brown on both sides.

Scatter beetroot and Halloumi over the top of the tomato and parsley and dress with best quality extra virgin olive oil, lemon juice and salt and pepper.

Serve immediately. Good on it’s own with pita bread or as a side with chicken, lamb, kebabs etc.

Grilled Halloumi and Courgette with tomato and mint salsa

August 18, 2010

Grilled Halloumi with Courgette tomato and mint salad

I kind of feel like it is a bit of a con writing this recipe as it is so very very easy. It is inspired by my friend Sophie who served me delicious grilled courgettes with a tomato and onion salsa at a BBQ a while ago and also by my lovely friend Rima who is the most amazing Lebanese cook ever!!! This is such a lovely summery meal you could serve it as a starter or as a light lunch with some lovely hot pita bread.

Ingredients (serves 2)

2 medium sized courgettes
1 block of Halloumi
4 large ripe tomatoes
1 small red onion
1 sprig of fresh mint
1/2 lemon
1/2 teaspoon of ground cumin
1/2 teaspoon of sweet paprika
Salt and Pepper
Olive oil

Method

To make the salsa – remove core and finely dice tomatoes. Finely dice red onion and add to a bowl with tomatoes. Add juice of lemon, cumin, paprika, finely chopped fresh mint and season to taste.

Cut courgettes length wise leaving on the tip and tail. Brush with olive oil and char grill until “striped” by the grill and cooked but still with bite (a little firm).

Take a dry non stick frying pan and heat on medium/high.

Slice Halloumi into 1/2 cm slices and fry until golden brown on each side.

Serve Halloumi and warm courgette topped with spoonfuls of the tomato and mint salad.

I am dribbling thinking about this…..

Mushroom pate – oh how I love mushrooms….

August 18, 2010

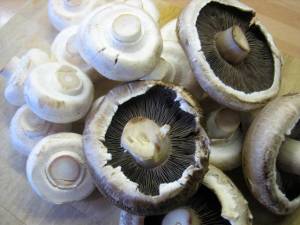
Mushrooms

Another first for me recently was mushroom pate. One of those things that I just have never tried to make – I love mushrooms and I love mushroom pate. I decided to serve this as the party I catered for too. Apologies that there are no photos of the finished product but I promise to add one when I make it again.

It was very simple to make, very tasty and if you are a mushroom lover like myself I strongly recommend you give it a bash!

Ingredients (makes about 400 – 500 mls)

500 grams mushrooms (can be a mix if you want – I used Swiss browns and closed cap white)
1 large onion
Fresh Tarragon (about 1 tablespoon of chopped leaves)
1 large lemon (more if you wish)
200 grams of cream cheese, you could use ricotta or mascarpone
Salt and Pepper
Fresh nutmeg
Butter
Olive oil

Method

Brush mushrooms to remove any dirt. Try to avoid washing them as they will absorb a lot of water.

Mushrooms

Slice mushrooms and saute in a non stick frying pan in a knob of butter and a splash of olive oil until cooked through and most if not all of the liquid released from the mushrooms has evaporated (do not brown). Leave to cool.

Finely dice onion and saute in butter and olive oil. When cooked through soft sweet and translucent (do not brown) leave to the side to cool.

Sauted onion

Juice the lemon and finely chop tarragon (1 tablespoon).

Add cooled mushrooms, cooled onion, cream cheese, lemon juice and tarragon to a food processor. Season with a large pinch of sea salt, several grinds of the pepper mil and about 1/4 of a finely grated nutmeg.

Blend until smooth (a little bit of texture is quite nice so not too smooth).

Taste and add more seasoning if needed and if you wish more lemon.

Pile into attractive ceramic bowls and serve with mini oatcakes. Also delicious on hot buttered wholemeal toast for breakfast.

Corn and ricotta fritters – easy, cheap and super versatile

August 18, 2010

Corn and ricotta fritters

I recently catered for a party, the brief was no warm food – in Scotland!!!! Certainly a challenge. One of the things I decided to try was corn fritters. My mum used to make them for us when we were kids and I loved them. However they were warm….so I did I test run and I am pleased to say that they are just as lovely cold as they are warm.

So I made about 70 of them, little weenie bite sized ones and topped them with a herby cream cheese and a baby roasted Roma tomato.

Success, every single one of them was gobbled up.

Now you don’t have to have them cold obviously, they are great eaten straight from the frying pan or toasted the next day or dare I say microwaved for little bit to warm them. Actually toast them – I hate microwaves!!!

Corn fritters are easy quick and tasty and can be eaten as a snack, for breakfast with some crispy bacon or as a light lunch or dinner with a salad and a tasty tomato and mint salsa….yummy:

Ingredients (makes about 20 mini ones or 8 – 10 larger ones)

7 tablespoons of plain flour
1/2 teaspoon of bicarbonate of soda
1 teaspoon of cream of tartar
Salt and Pepper
200 grams of fresh full fat ricotta
50 grams of finely grated Parmesan (fresh not dried of course)
1 large onion
1 large egg
2 cobs of fresh sweetcorn
Milk (approx 500 mls)
50 grams of unsalted butter

Method

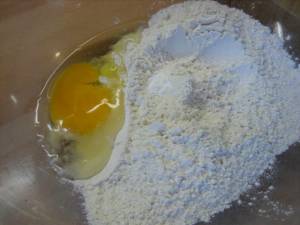
Flour egg cream of tartar bicarb

Sift flour, cream of tartar and bicarb into a large mixing bowl. Add the egg and some milk and beat until combined. Add more milk, a large pinch of salt and several grinds of the pepper mill. The batter should be relatively thick – about the same consistency of drop scones (Scottish pancakes) or picklets.

Place in the fridge covered in cling wrap.

onions and butter

Finely dice onion and saute on a low to medium heat with the butter and a pinch of salt until soft sweet and translucent. Leave to the side.

Removing corn kernals from cobs

Remove husk from corn and wash the cobs. Cut the kernels from the cobs.

Batter corn onions ricotta and parmesan

Add sautéed onion, corn, ricotta and finely grated parmesan to the pancake batter and stir through to combine.

Batter mixed through

You may need to add a little bit more milk to loosen the batter if it feels a bit too stiff.

Fritters in pan

Heat a non stick frying and grease with a little butter.

Dollop spoonfuls of the pancake batter into the pan giving each spoonful a little room as they will spread a bit.

Keep the temp at a medium heat as you do not want them to be burnt on the outside and uncooked in the middle.

Turn fritters when golden

Turn when golden brown and bubbles have formed and burst on the top side of the pancake/fritter.

Cook until both sides are golden and the pancake is cooked through. If the outside is cooked and the inside is not you will need to reduce the temperature.

Cool in a clean tea towel – it will absorb any moisture and keep them nice and crisp on the outside.

Eat straight away or cool completely in tea towel then seal in a Tupperware box and refrigerate until you want to eat them. They should keep for a couple of days and I don’t see why you wouldn’t be able to freeze them actually….

Apple fennel and bitter leaf salad (for something a bit different)

May 17, 2010

Apple fennel and bitter leaf salad

For many years I have had a bit of an issue with fruit being used in savory dishes. I had a very distressing experience in the hunter valley with a strawberry and scallop dish. Vomit!!

Recently I have started to branch out, throwing caution to the wind, and use the odd pear or apple in a salad. What a success!!

I actually feel a wee bit silly adding this to my recipe collection as this salad really is ridiculously simple and easy to make. However there are still a great proportion of the general public headed straight towards a trusty cucumber, lettuce and tomato combo for a salad. Boring!! (unless you are using AMAZING tomatoes of course).

I hope this inspires you to branch out a little and try fruit in your salads (but not strawberries and scallops – please!)

1 cox’s orange pippin
2 small chicory (witlof)
1 medium size bulb of fennel
1 small bag of wild rocket
1 small bag of baby Italian leaves (beetroot leaves, radicchio, red chard, watercress, lollo rosso, baby cos etc)
1 bunch of flat leaf parsley

Dressing

1 table-spoon of Dijon mustard
1 teaspoon of runny honey
Extra Virgin olive oil
Red wine vinegar

Finely slicing fennel

Remove outer leaves of fennel and cut of any shoots. Cut in half from top to bottom through the narrow side (leaving 2 wide halves). Very finely slice length wise.

Wash and dry leaves (if not already washed) – make sure you spin the leaves in a salad spinner this is VERY important. If the leaves are wet you will dilute the dressing and it will taste very average.

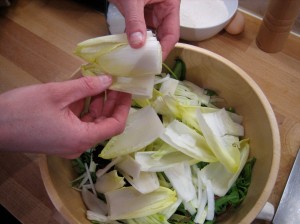
Add leaves and finely sliced fennel to a large bowl, peel the outer leaves from the chicory (witlof) and cut the bottom 1/3 off. Separate the leaves and add them to the bowl. Finely slice the bottom 1/3 of the chicory and add to bowl.

Separating chicory leaves and adding them to the bowl

Wash and dry small/medium bunch of parsley. Pick off the leaves discarding any discoloured ones or stems. Add to bowl.

Picking leaves from bunch of flat leaf parsley

Wash apple and cut in half removing core. Finely slice and add to bowl.

Finely sliced apple added to bowl

To make dressing I find using a clean jam jar makes life a lot easier.

Add 1 table-spoon of Dijon mustard, 1 teaspoon of runny honey about 1/2 cup of extra virgin olive oil and 1/4 cup of red wine vinegar to the jar. Put the lid on and shake, it should quickly form a thick dressing. Taste it and it should taste a little bit too vinegary – this is good. If it is a wee bit mild add a bit more vinegar.

Add dressing bit by bit to salad whist lightly tossing through with your hands. The leaves should be coated but not drenched.

Apple fennel and bitter leaf salad

Serve immediately! This can be eaten as a starter or along side fish, chicken, pasta, risotto etc. You can also make it more substantial and have it for lunch on its own by adding some cheese (goats cheese, brie, Gorgonzola etc) and some toasted nuts (hazelnuts, pine nuts, cashews etc).

Deliciously light gnocchi with rich Gorgonzola sauce and roasted hazelnuts

May 17, 2010

Gnocchi with creamy Goronzola sauce

My sister is a huge fan of anything creamy, cheesy or creamy and cheesy so when I suggested “Gnocchi with a creamy Gorgonzola Sauce” as an option for dinner I knew before I asked what the answer would be.

“YES PLEASE!!”

Normally I shy away from such creamy cheesy decadence however there was a tub of Mascarpone in the fridge left over from making Tiramisu and a wedge of Gorgonzola – realistically the choice was already made….

Now the thought of making homemade gnocchi I know is making you feel a little panicky already but I promise you you do not need to be a budding Gordon Ramsey to be able to pull this dish off and wow your friends.

Ingredients (serves 4)

Gnocchi

1 kg floury potatoes (Maris Piper, Golden Wonder, Sebago) – this is unpeeled weight
200 grams plain white flour ideally a stone ground organic one
1 egg (free range organic preferably)
Salt and Pepper

Gorgonzola Sauce

250 gram tub of Mascarpone
200 grams Gorgonzola
Small bunch of Chives finely chopped

Skinned and roasted hazelnuts (or walnuts)

Steaming potatoes

First off peel and chop the potatoes into 2 cm cubes, steam until cooked which should take about 10 – 15 mins depending on how good your steamer is. Mine took about half an hour because it was not the more effective of steamers. Annoying!

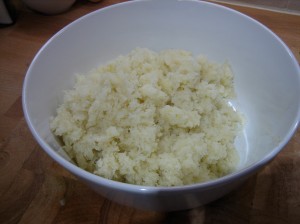
Cooked potatoes passed through a fine sieve

Once the potatoes are cooked pass them through a fine sieve into a large mixing bowl, you can use a potato ricer if you have one. Add the egg, a large pinch of salt and several grinds of the pepper mill, add the flour in and mix into a soft dough.

Sieved potatoes with egg, seasoning and flour

Turn out onto a clean and lightly floured surface.

Split dough into 4 portions. Take one of your potions and roll into a long thin sausage shape – approx 1 1/2 wide. Take a butter knife and cut the sausage into small pieces approx 2 cm long and place on a lightly floured plate or tray. Do this with the rest of the dough.

Gnocchi dough rolled into sausages and cut into small pieces

**** once you have made your gnocchi you can press it lightly with a fork to make it ridged, this is good as the gnocchi will hold onto sauce better. It is not essential, I didn’t do this as I was in a rush.

Freshly made gnocchi (uncooked)

Bring a large pot of water to a rapid boil and add a large pinch of salt.

Warm a ceramic dish.

Dropping gnocchi into rapidly boiling salted water

Take the Gnocchi and in pop the little dumplings into the water one by one (you will probably need to do this in about 4 batches).

As soon as the dumpling pop to the surface they are cooked, remove them with a slotted spoon and pop them into the warmed dish.

Mascarpone being heated

While this is all happening take a small pot, ideally a heavy based one, and add the tub of Mascarpone. Once it starts to bubble crumble the Gorgonzola through and stir. Leave on a low heat until Gorgonzola is thoroughly melted, add some freshly ground pepper and the finely chopped chives.

Gorgonzola being added to the heated Mascarpone

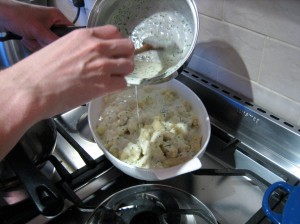
Once you have cooked all your gnocchi pour the sauce over the top and pop under the grill until it bubbles and is golden brown.

Gorgonzola sauce poured over cooked gnocchi

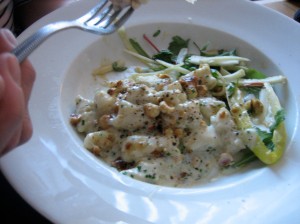
Gnocchi with Gorgonzola sauce grilled, adding roasted hazelnuts

Serve with chopped roasted hazelnuts sprinkled on top, a bitter leaf salad and some crusty bread.

Tucking in to the gnocchi

Yummy!!!!!